10 Tips for Getting Your Crossbow Ready for Season
/ May 12th, 2020Follow this 10-tip checklist to prepare your hunting crossbow for the upcoming season:
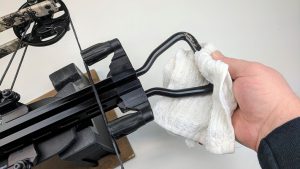 Tip #1 – Check your crossbow for dirt, grit, or debris.
If your hunting crossbow has dirt or grit on it from last season or if it has collected dust from off-season storage, use a cotton cloth with simple dish soap and water to gently wipe down any parts that need it. Don’t forget to check the groove in the flight rail and remove any debris that you find.
Tip #2 – Check your string and cables for age and wear to determine if you need to have them changed.
TenPoint recommends changing the string and cables every two years, regardless of whether they are showing physical wear. If you have not changed your string and cables in the last two years, contact your local dealer to make an appoint to do so. If you are unsure whether you need to change the string and cables, your local dealer can inspect them and assist you with this determination.
To find your local TenPoint Dealer, please click HERE.
 Tip #3 – Apply wax and conditioner to your string and cables.
If your string and cables have any exposed, non-served strands, apply string wax to them. After applying wax, make sure that you thoroughly work it into these strands by rubbing them with your thumb and forefinger or a small piece of leather. Next, apply conditioner to the servings on the string and cables, especially the serving wrap around the end-loops. TenPoint’s Premium Lubricant with Foam Applicator makes both an excellent serving conditioner and flight rail lubricant. NOTE: Please consult the General Owner’s Manual for your crossbow’s model-specific string and cables maintenance instructions by clicking HERE.
Tip #4 – Check all screws, nuts, and bolts for tightness.
Over the course of a season, the screws, nuts, and bolts on your hunting crossbow may work lose from shooting and transporting it. The crossbow has many parts that will not function properly unless mounted securely. Be sure to check all exposed screws, nuts, and bolts for tightness, and remember not to over-tighten. Hand-tight should be all that is required.
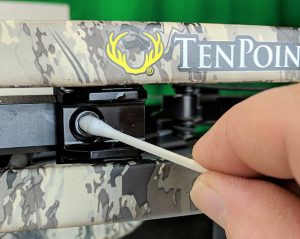 Tip #5 – Apply rust-protective oil.
Apply some rust-protective oil to any parts on the crossbow that might be susceptible to rust from moisture, like screw heads, bolt heads, nuts, axles, or clips. Use a cotton swab to apply the oil to a precise location and to clean up any excess oil left after applying.
Tip #6 – Apply lubricating oil to moving parts that require it.
Certain parts on your hunting crossbow like the axles, Dry-Fire-Inhibitor, trigger mechanism, and safety slide should be lubricated at least once per year to ensure proper and smooth functioning. Please check the General Owner’s Manual for your crossbow to determine which specific areas need to be periodically lubricated with oil.
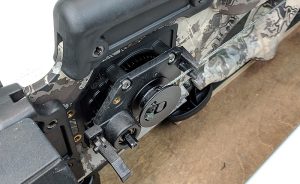 Tip #7 – Closely inspect your cocking mechanism.
Check your cocking mechanism to be sure all parts are in top working condition, including springs, cords, hooks, handles, and covers. If you find damage or wear to any of these parts, you should arrange to have the part(s) replaced immediately. Apply string wax to any cords that feel dry to the touch. Check all screws, nuts, or bolts in the mechanism for tightness and apply rust-protective oil. Apply lubricating oil to the gears and levers in the ACUdraw or ACUdraw PRO crank-style cocking mechanisms. If you are unsure about how to repair or maintain your cocking mechanism, reach out to your local TenPoint dealer and schedule an inspection.
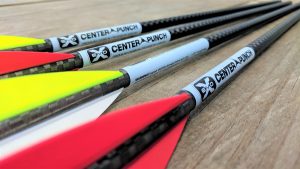
Tip #8 – Inspect your arrows for cracks, dents, or damage.
You should always check your crossbow arrows for cracks, dents, or damage prior to shooting them. Inspect carbon arrow shafts for hairline fractures or cracks, as firing a damaged carbon shaft can cause it to shatter, scattering fragments which could cause serious injury to you or others. Arrow shafts made from aluminum can become dented or bent, which can cause the arrow to fly in an unintended direction, potentially causing serious injury to you or a bystander. Check also to make sure that your arrows have the proper nock for your crossbow model and that none of the nocks are damaged. Finally, check for any torn or missing vanes. Remove and dispose of any arrows that you find have damage to the shaft or that cannot be re-fletched.
 Tip #9 – Spin your arrows with field points to check for straightness.
Check your field points for any dented ends and spin your arrows after screwing in your field points to check for bent ferrules, inserts, or shafts. If you find any arrows that “wobble” when you spin them, determine the part of the arrow that is bent or that is causing misalignment of the arrow components. Sometimes an arrow shaft can be straight but the ferrule on the field point is bent. This does not mean that you need to dispose of the whole arrow. You may be able to remove the field point and replace it with a new, straight one that will allow the shaft to fly accurately
Tip #10 – Inspect your crossbow target.
Check your target to be sure that it is not showing signs of deterioration from last season’s shooting or weathering that has occurred from being outside over the winter and spring. Foam targets break down over time, and they can reach a point where they no longer can stop an arrow from penetrating completely through it. If you have a screen-style box target or a bag-style target, you may need to redistribute the material inside of it by rolling it on the ground on its sides, or “fluffing” the target. This ensures an even distribution of the material inside and should stop your arrow, regardless of the location you shoot on the target’s face.
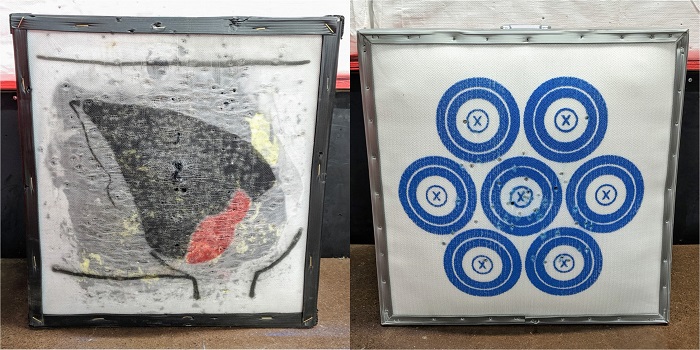
The target on the left shows significant wear from shooting and should be replaced. The target on the right shows very little wear and can continue to be used.