Ten Tips for Taking the Best Harvest Photos
Brian Flaherty / September 21st, 2021When a hunter harvests an animal, the moment is special. Many hunters preserve this special moment by taking a photograph with the animal, which often includes the hunting implement used. To show proper respect to the animal you have harvested and to best preserve the memory of your hunt, here are ten tips to help you take the best harvest photos.
#1 Use good quality photography equipment.
You cannot take a good picture of your harvest if you do not have good photography equipment. Fortunately for hunters, most smartphones now have high quality cameras already built-in, so there is no need to carry a separate camera with you into the field. Most Smartphones also include photo editing software that easily helps you to apply a filter and put the best final touches on your photo. If your cell phone does not have a camera or the camera takes low quality pictures, consider purchasing a compact digital camera that fits easily into your pocket or hunting pack. If you plan to hunt alone, you should familiarize yourself with your camera’s timer settings before entering the field. Also, consider investing in a small tripod or camera stand, as keeping the camera still while snapping the photo yields the clearest images.
#2 Choose the best background.
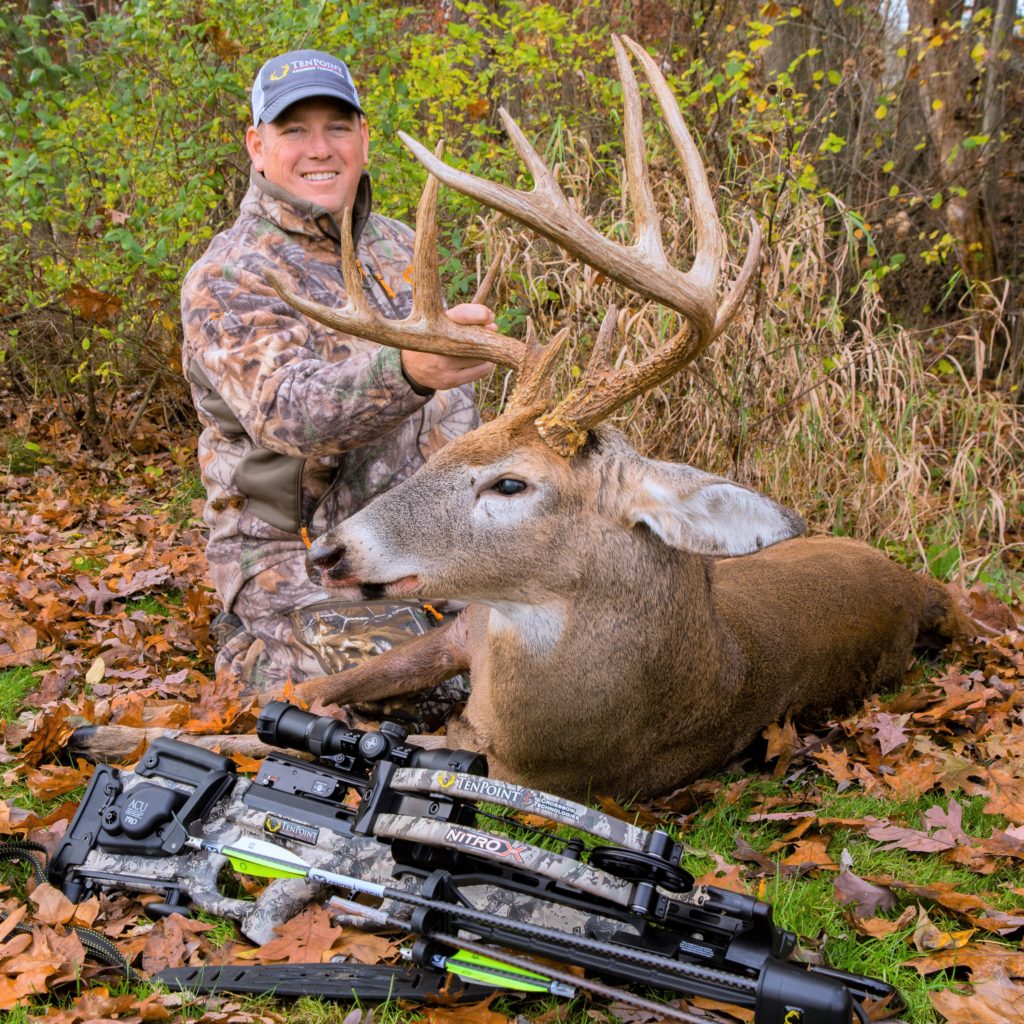
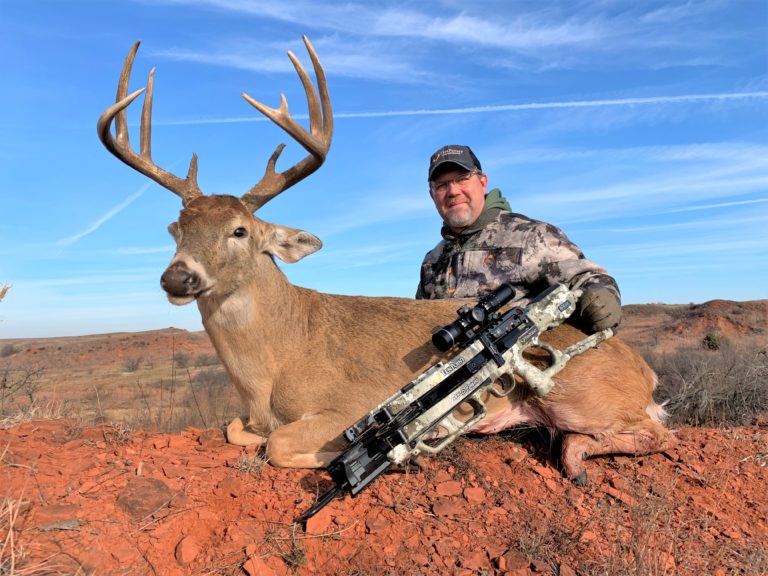
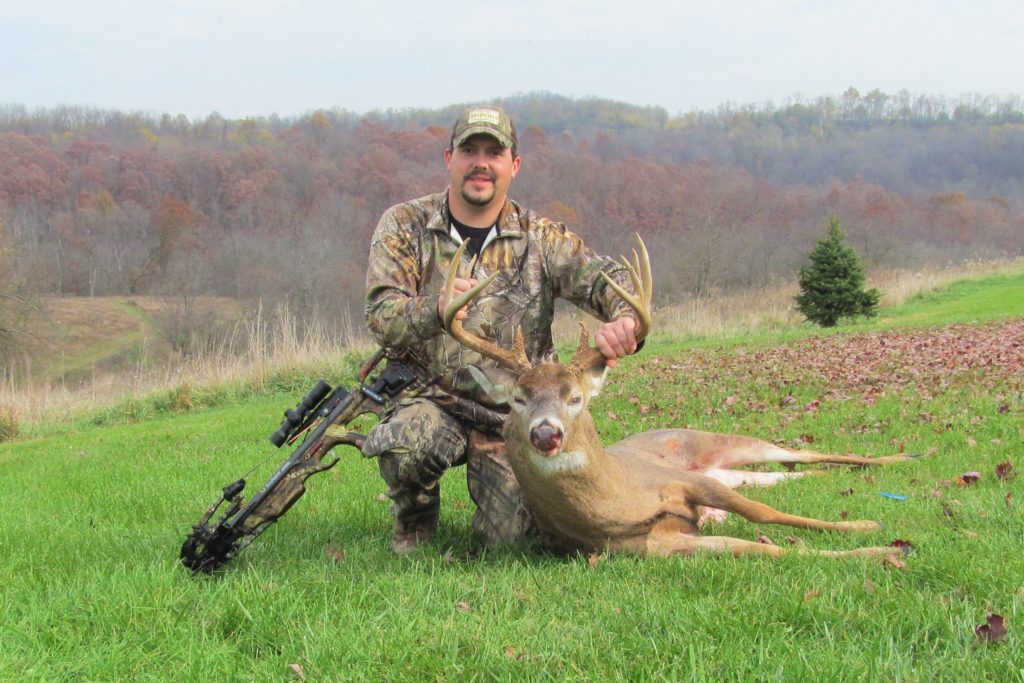
The primary subject of your photo should be the animal, but, choosing the best background will help you tell the story of the location of your hunt by featuring the landscape or a landmark close to the harvest area. Are you hunting in the mountains? If so, position the animal and take the photo where you can see the mountains in the background. Are you hunting on a farm? If so, take your photo with the barn in the background. However, the most important thing to remember about selecting a good background is to choose an area that yields the best contrast with the animal’s features. In other words, be careful when choosing a background that displays the same colors as the animal or a background where the animal “blends in”. Having a background with little contrast makes it more difficult to see the animal and to highlight its unique features.
#3 Make sure you have adequate lighting.
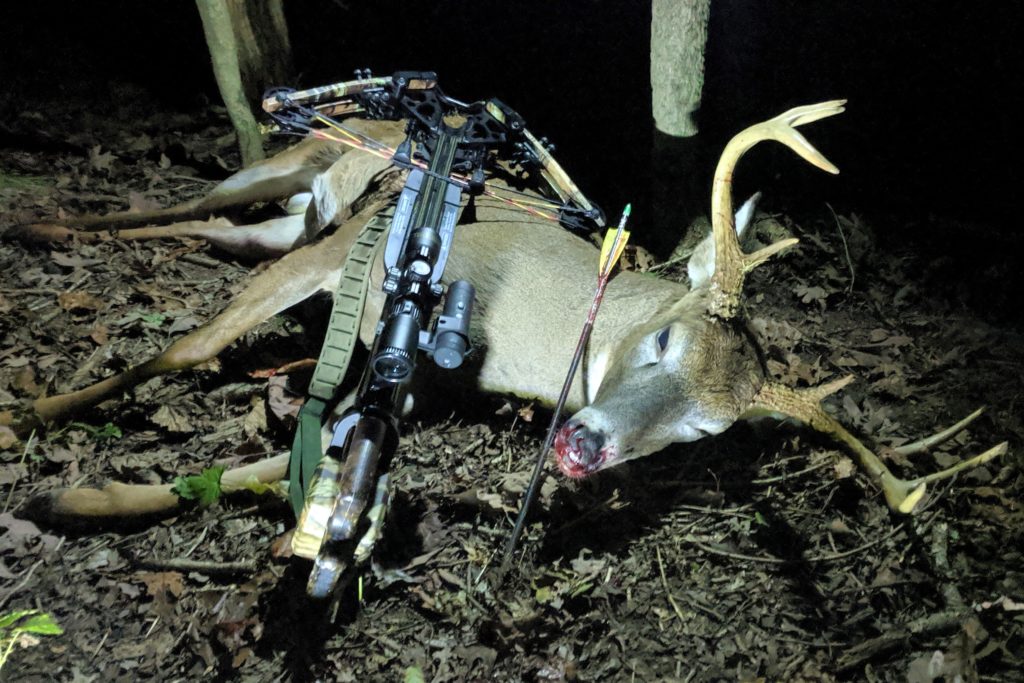
One of the trickiest aspects of taking a good harvest photo is having adequate light. If you harvest an animal at night, wait until the next morning, when possible, to take your harvest photo in the daylight. When taking photos during sunny days, the photographer (or camera) should face away from the sun and the hunter and animal should face towards the sun. If you do not have the option to wait until daylight, be sure to enable the flash setting on your camera and use a flashlight or other light source to help add extra light to the scene.
#4 Prepare the animal appropriately.
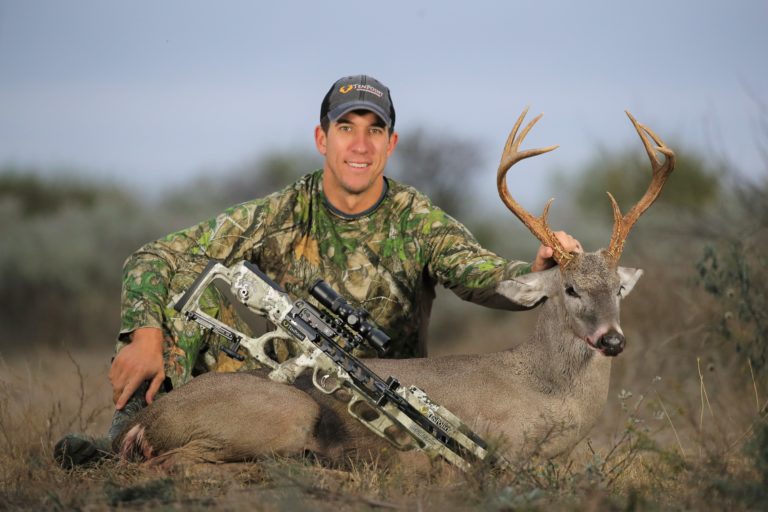
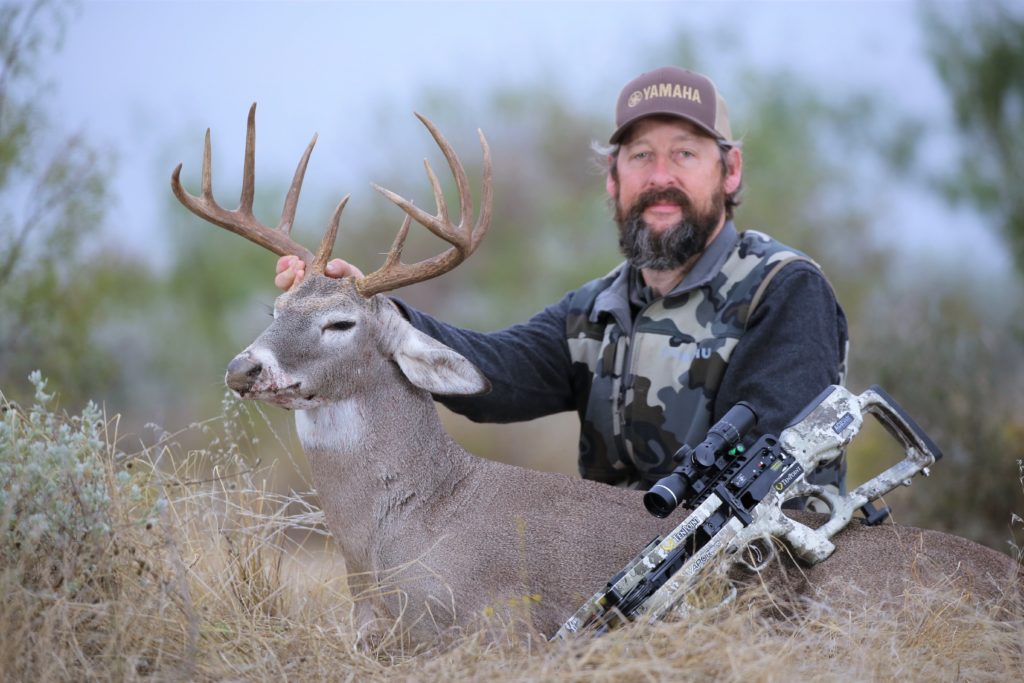
The primary subject of your photo is the animal, and you should take the picture in a way that shows your respect. This means you should clean any excess blood, mud, or debris from the animal’s coat or face that may have collected. You would be surprised how much cleaning you can accomplish with a microfiber cloth and a bottle of water, which you likely already carry in your hunting pack. If the tongue is sticking out, push it back in the mouth so that it is not visible.
#5 Place the animal in a “bedded” position.
Ideally, you should take your harvest photo as quickly as you can after recovering the animal. Doing so allows you to easily change the animal’s position before rigor mortis can take hold. Many hunters place animals in a “bedded” position with the legs tucked underneath the body, as if the animal were “bedded” on the ground. If you have already field dressed the animal, this will hide the incision you made and can also hide excess blood on the animal’s coat. Avoid taking pictures with the animal when it is hanging or if the animal has been placed into a truck bed or onto an ATV. These positions oftentimes do not allow you to adequately highlight all the animal’s unique features.
Do YOU want your crossbow harvest photo featured in TenPoint’s Tag Out Gallery? Be sure to tag your BEST photos with #tenpointcrossbows and @tenpointcrossbows when posting to Facebook and Instagram or share your photos directly with us by clicking HERE!
#6 Prepare yourself to be photographed.
Prepare yourself to be photographed in the same way you prepared the animal. In other words, wash off any excess blood from your hands and arms and remove any blood-stained hunting clothes. You may also want to remove your hat, as the shadow cast by the bill of a ball cap can hide your face. Remember: your photograph tells the story of the hunt. Do not change out of your hunting clothes prior to taking the picture, as the photo will seem overly staged. You do not want to draw the viewer’s attention away from the animal to what you are wearing. If you are hunting with family or friends, you may also want to invite them to be part of your harvest photo.
#7 Position yourself beside or behind the animal.
Since the animal is the primary subject of the photo, the hunter should be positioned behind or beside the animal in a comfortable kneeling or seated position. Look for a stick or a rock to use as a support for the animal’s head or carefully hold the head with your hand while taking pictures. If you hold the animal’s head with your hand, be sure to position yourself so that your hand does not interfere with seeing all the animal’s features. Never sit on or straddle the animal for a photo.
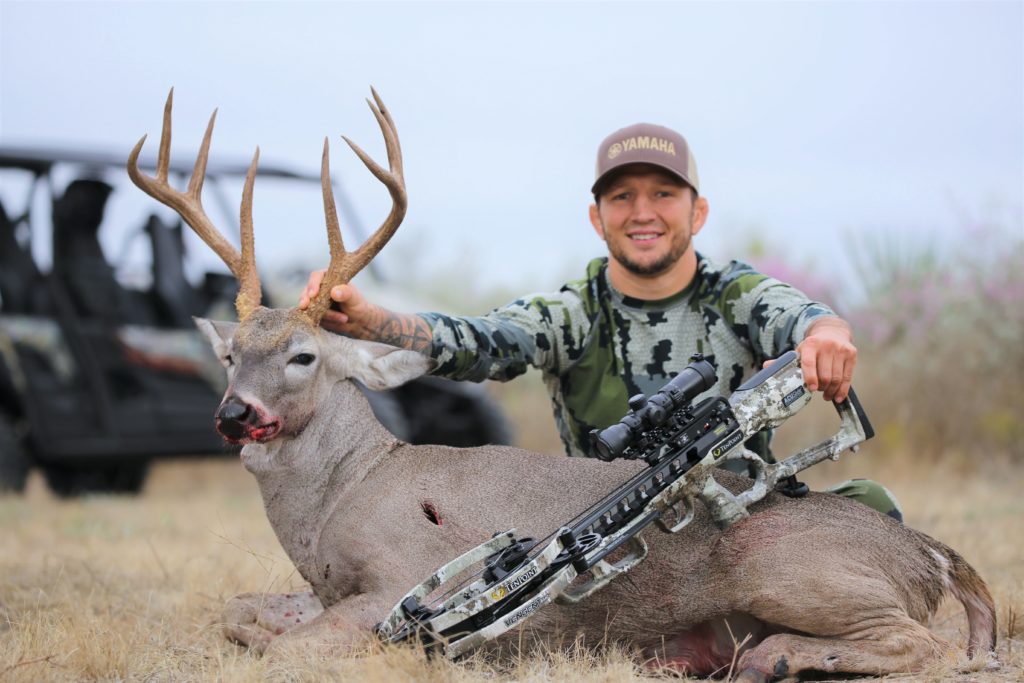
#8 Position your hunting implement safely.
Harvest photos are often taken minutes after recovering the animal. The moment of recovery is a very exciting time, and you may be feeling many different emotions simultaneously. Most hunters will re-load their hunting implements after taking a hunting shot in case another shot is needed to help the animal expire. Do not forget to unload your hunting implement upon finding the expired animal. If you are carrying a crossbow, you can leave it cocked but remove the arrow from the flight rail. For your photo, position the hunting implement in an obviously unloaded, safe manner. This means you should make sure the hunting implement is unloaded and pointing in a safe direction. The hunting implement should never point in the direction of the hunter. Also, position the hunting implement so that its features can be seen in the photo, but never in a way that blocks the view of the animal’s face or most of its body.
#9 Take lots of photos from different angles.
These days, most folks use digital cameras to take harvest photos instead of using film. This gives you the opportunity to take several photos from different angles to capture the perfect moment. When taking your harvest photos, position the camera at a low angle to take the photo, at eye level or lower. If you are photographing an animal with antlers or horns, you may even want to position the camera lower than eye level with the hunter, so that you are shooting at an upward angle that emphasizes these features. If you set your camera at a low angle, you can achieve a nice contrast between the sky and the antlers. Do not be afraid to be creative by taking lots of photos from different angles with the hunter in different positions.
#10 Prepare your photos specifically for sharing on social media.
If you plan to share your harvest photo on your own social media pages or you plan to submit your photo to a manufacturer for posting to the company’s website or social media pages, frame your photograph such that it can be square-cropped without losing any essential detail from the photo. Most social media services favor the presentation of square-cropped photos instead of ones that are cropped at a 4:3, 3:2, or 16:9 size ratio. Also, post or send photos with the highest resolution, as the quality of a low-resolution photo may be diminished after posting to a social media platform or website. Finally, take advantage of the photo editing app on your phone or editing software on your desktop computer to apply filters to the photo which will help to add the perfect finishing touches.