10 Steps To Properly Chronograph Your Crossbow
/ May 20th, 2019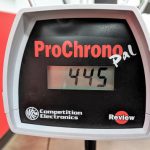
Whether you are determining crossbow bolt speed to calibrate a variable power scope or you want to calculate the kinetic energy of your bolt setup, knowing how to chronograph your hunting crossbow properly is critical to obtaining accurate speed data.
Here are 10 steps for you to follow to properly chronograph your crossbow:
Step 1: Gather the following items: your crossbow; chronograph; crossbow target; shooting rest; rangefinder; crossbow bolt with field point; pen and paper; flight rail lubricant.
Step 2: Set up the rest that you are using for this test. Your rest should be stable and should not be easily moved around on the table. Be sure that the front of the shooting rest area is clean and free of obstructions, as you do not want a limb or cam to strike any objects while taking a shot.
Step 3: Set up your target so that it is 20-yards downfield from the rest. Use your rangefinder to set the target at exactly 20-yards.
Step 4: Position your chronograph in front of the rest such that, when you are resting the crossbow, you have a clear shot through the gates of the chronograph to your target. Adjust the elevation of the chronograph accordingly. Use the length of your crossbow bolt to determine the proper distance from the rest to position the chronograph. For example, if you are shooting a 20-inch arrow, the distance from the end of the flight rail on your hunting crossbow to the first gate of the chronograph should be as close to 20-inches as possible. Since you have set-up your target at 20-yards, the chronograph should also be positioned parallel, or nearly parallel, to the ground.
![]()
Step 5: Power on the chronograph and place it in the “ready” mode.
Step 6: Apply lubrication to your flight rail to prepare for shooting.
Step 7: Cock your hunting crossbow, place it on the rest, and load a bolt. Be sure to position the crossbow in the same location where you had it earlier when setting up the chronograph. Using the top dot or crosshair in your scope, take aim at the target, checking to make sure that where you choose to aim will allow the crossbow bolt to easily pass through both gates of the chronograph, unimpeded, without risk of the arrow hitting the chronograph.
![]()
Step 8: Take your first shot. Immediately after the shot, check the chronograph for the first speed reading. Write this speed down with your pen and paper, and then retrieve your crossbow bolt.
Step 9: Repeat this shooting process two more times, each time recording the speed indicated by the chronograph.
Step 10: Finally, you are ready to determine the average speed. Add the three speeds together and divide by three. The result is an accurate representation of your crossbow bolt speed.